Accessing My Desktop Remotely
Motivation
I recently wanted to explore how neural networks operate, and set up some of the models myself. I found a great course and guidance from my peers to get started but was not comfortable with how I could get the work done. My laptop could be used easily and be brought into the AI office space, but was lacking a dedicated GPU. My PC has everything it would need to run the models with ease, but is very rooted in place.
Thus I needed a way to access my PC through my laptop from a remote location, giving me the freedom to work from anywhere while utilising all the computing power I currently have access to at this stage. Looking into setting this up securely is a larger can of worms than I expected so I’m writing up the steps and findings for posterity.
The Setup
The requirements for this project boiled down to:
- Having access to my local network without exposing my PC to the internet directly.
- Only the SSH port should be available for connection, and it should only allow key-based authentication (no username/password). This would eliminate any brute-force attacks from being effective, and hopefully deter people from trying in the first place.
To achieve all this the setup grew to be:
  flowchart LR
 E[Laptop] <--> A[Internet]
  A <-- Dynamic DNS --> C[VPN on RpPI]
  C <-- key authentication --> D[SSH to my PC]
Pi Setup
I had a build on my Pi already, but I didn’t configure it to anything useful. So I grabbed the SD card and flashed Raspberry Pi OS Lite, 64bit. It’s much easier to set up a hostname, initial WiFi and SSH config settings through the Pi Imager, so I used that.
Dynamic DNS
Dynamic DNS (DDNS) is a method of automatically updating a name server in the Domain Name System (DNS), often in real time, with the active DDNS configuration of its configured hostnames, addresses or other information. – Wikipedia
I needed to be able to access my Raspberry Pi, which means I needed to have access to my router. As with most home networks, the IP address for my router is managed by my ISP, and is not fixed to a specific one. Any router reboot, or network reconfiguration could change my home IP without notice.
This is where Dynamic DNS becomes useful. It assigns a name to a personal account of mine, and with the right configuration, it periodically looks up my IP, and links it with the assigned name. So I could use the name I’ve chosen, and it would always link to my home network (so long as the DDNS service is up and running).
There are many DDNS services, free and paid alike. I opted for DuckDNS.
The configuration was straightforward and was compatible with a lot of Linux devices. Once all was said and done, there was a one-liner bash script run by a cron job. It’s specific to the person, and is generated by their website once you log in. N.B It requires something that’s on all the time (or at least on for when you’re trying to use it while you’re away).
Router Config
Setting the Pi up with DDNS did not need any extra network configuration, because it is reaching out to the Internet and providing information to the DuckDNS servers. If I wanted a VPN to be accessible, however, I needed to also know the address of my Pi, not just my router.
For that to be the case, I needed the MAC address of my RpPi.
Running ip a on the command line gave me the MAC address on the Pi’s WiFi
adapter under the link/ether section.
Then logging into my router, and enabling “Expert Mode” 🙄, I had to navigate
to Settings -> Local Network -> StaticDHCPv4 - Local Network.
There I added an IP of my choice, included the MAC address, and selected my
RpPi hostname from the drop-down menu.
(These instructions are on a per-router basis, so will likely be useless going forward).
PiVPN
The PiVPN setup was straightforward, with the only gotchas being specific settings for this use case.
Installation was just a curl command:
1
curl -L https://install.pivpn.io | bash
Most of the following screens had their default settings. After I reached this screen, I had to actually pay attention.
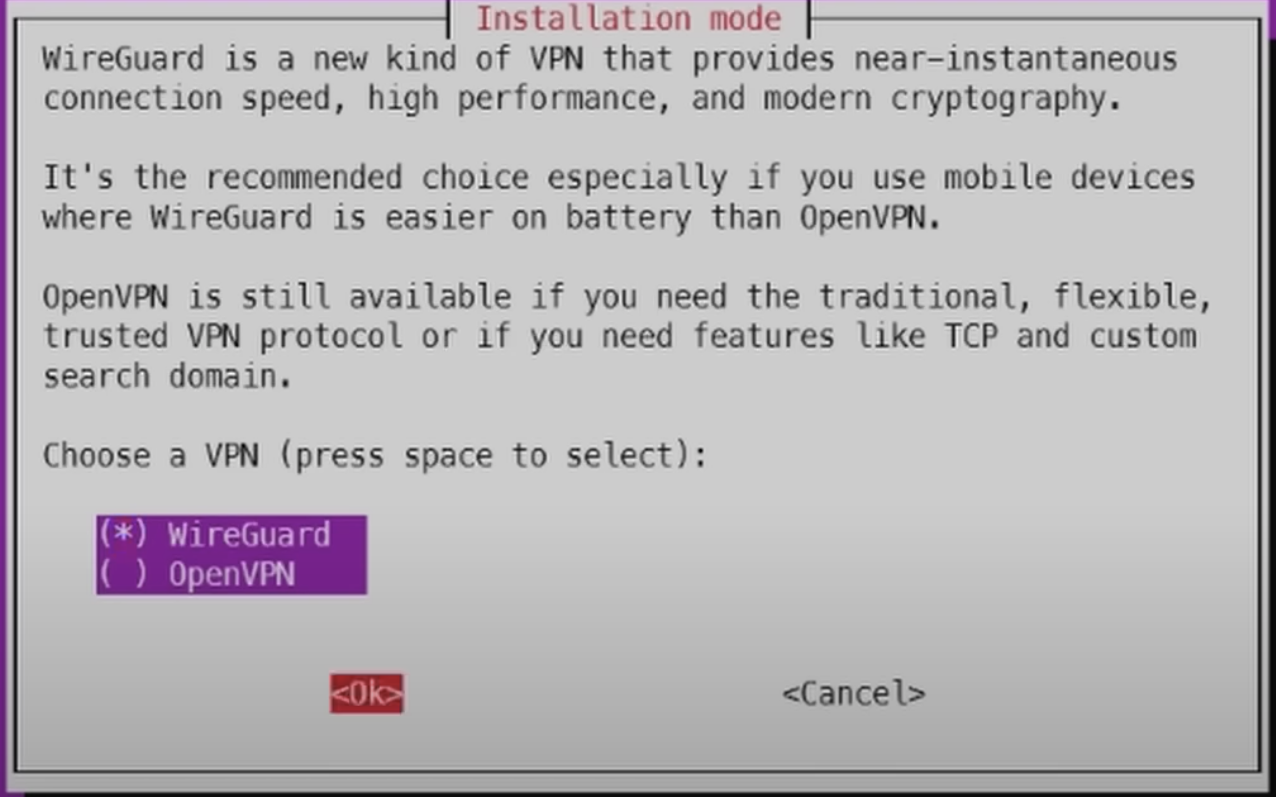
At this stage the port used for WireGuard was selected, default being 51820. Then there’s a choice of public DNS provider, which is arbitrary for the PI. The following page configures how the connection to the server, and they had to be changed to “DNS Entry”:
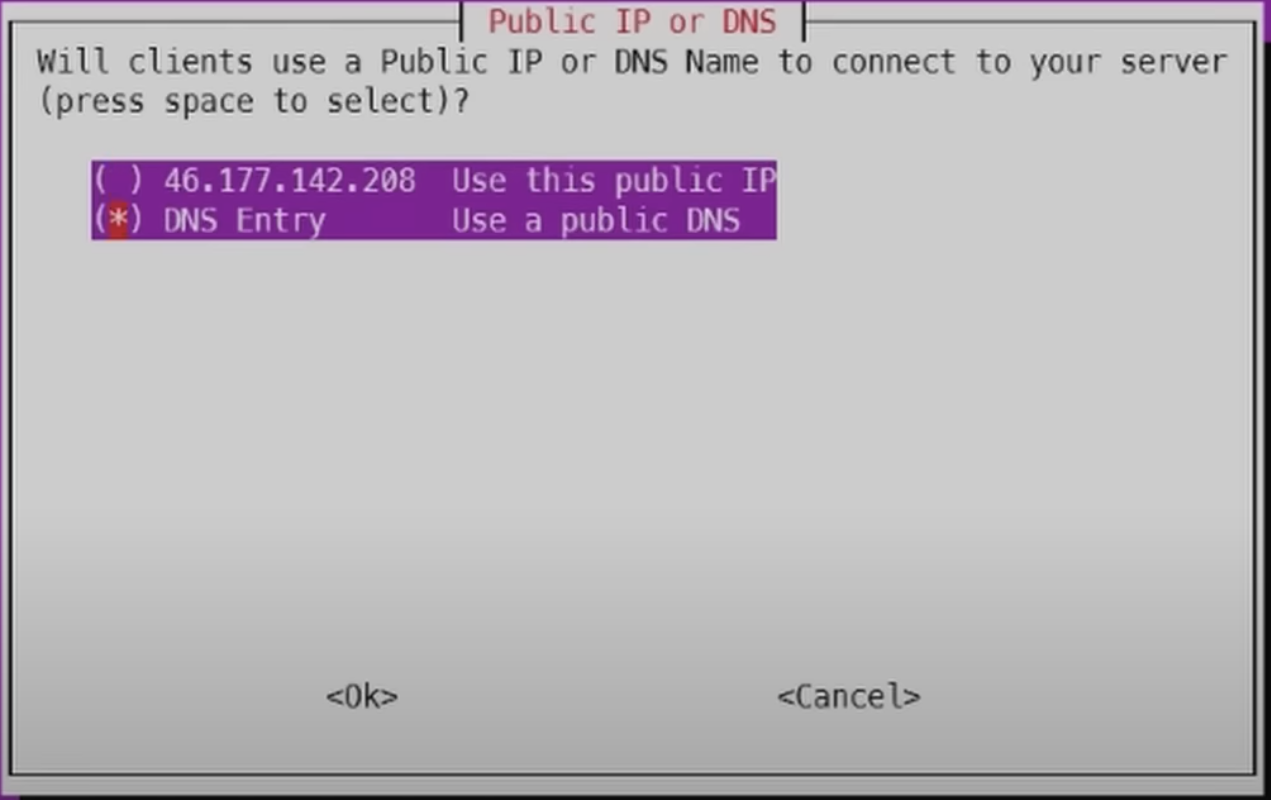
Then input the DDNS address was selected.
In this case it should be "domain".duckdns.org.
Continuing the installation and rebooting lead to a Raspberry Pi with PiVPN
installed.
WireGuard
Now the VPN server was set up, but it didn’t allow just anyone to log in. Clients need to manually be added to the Pi. Technically, you can make just one client and pass the config around to all devices, but it’s more secure to have an individual config per client. Setup was easy enough, so this shouldn’t be a problem, and at the current stage I only had one client anyway.
I run pivpn add, entered the sudo password, and added a name for my laptop.
Then I copied the generated .conf file across, and installed WireGuard on
my laptop by running sudo apt-get install wireguard.
Some permission wrangling was in order as well before adding the configuration:
1
2
3
4
5
6
7
sudo su

mkdir -p /etc/wireguard
chown root:root /etc/wireguard
chmod 700 /etc/wireguard

mv "myconfig".conf /etc/wireguard/
After that, the commands to enable and disable the VPN are simply:
1
2
wg-quick up myconfig    # enable VPN
wg-quick down myconfig  # disable VPN
More Router Config
Having WireGuard set up wouldn’t help at this stage because my home router wouldn’t actually allow any traffic through to reach the Pi. This is a good thing in general, but in this case I needed to set up the appropriate port-forwarding rules. So I logged-in to my router once again, went to Internet->IPv4 Port Mapping -> Static Port Mapping, and port-forwarded the appropriate port using UDP and my Pi’s (now static) IP address.
SSH Key Authentication
Setting up SSH was a bit of trial and error. I didn’t want my Pi to use password authentication, which means the system needed to be working on SSH Keys alone.
I finally used ssh-keygen to generate the key pair and
“Seahorse” which is a Linux key manager to handle how my laptop stored the key.
I also learned that ssh-agent only stores the private key ephemerally which was
the reason for a short-lived initial attempt.
The
-tflag changes the type of key generated, and the-cflag gives a name to the key-pair
Then I used ssh-copy-id to transfer my laptop’s public key to the Pi.
For the second hop to my PC, I had to repeat the process from my Pi to my PC,
and also vice-versa.
This was likely not required, but it helped troubleshooting setting up the keys
to my Windows PC.
Investigating what ssh-copy-id automates, I found what it appends in a file
in Linux called authorized_keys.
Turns out that in Windows, based on your account type, there’s a whole separate
file used at C:\ProgramData\ssh\administrators_authorized_keys.
A slight snag was that my PC needed a fixed IP as well if I didn’t want to include a step of logging into my router and look up its IP every time.
Configuring passwordless SSH
The file to edit was /etc/ssh/sshd_config.
There is a line about enabling public key authentication:
PubkeyAuthentication yes.
There is also a line about disabling password authentication:
PasswordAuthentication no.
Both needed to be explicitly set, and likely uncommented if needed to actually get it to work.
Debugging Notes
There are debug messages that both the SSH server and SSH client can show.
For the server, the sshd service needs to first be stopped
(Usually sudo systemctl stop sshd.service).
Then it needs to be run manually with the debug flags.
This may not work immediately, because environment variables and temp files
are created during log-on that get deleted with the service being stopped.
Manually touching them again fixes that, if it is an issue.
Debugged service: /usr/sbin/sshd -ddd
For the client, the debug command just includes the flag -vvv
Config files and proxy jump
Two config files helped with simplifying the process for reaching my PC.
This means the SSH command becomes a short one-liner instead of having to
remember all of the parameters.
Stored in each case’s ~/.ssh/config.
The Pi’s Config
1
2
3
Host #custom-name
  HostName #IP Address
  User #username
The Laptop’s Config
1
2
3
4
5
6
7
8
Host #custom-name-pi
  HostName #Pi IP Address
  User # Pi username

Host #custom-name-PC
  HostName #PC IP Address
  User #PC username
  ProxyJump #custom-name-pi
Adding the ProxyJump line meant that running ssh custom-name-PC now first
ran ssh custom-name-pi and then used the custom-name-PC settings to log into
my PC.
VS Code specific settings
VS Code originally seemed easy to set up having everything else up and running,
but it still presented some awkwardness.
After installing the remote SSH plugin, I could set up a connection to my
Pi, but would fail to establish one with my windows PC.
It turned out that there are specific settings to be checked for a connection
between a VS Code Linux client and a windows SSH server.
I’ve included them all below, windows-hostname should be changed to the name
in the SSH config file.
1
2
3
4
5
6
7
8
{
  "remote.SSH.remotePlatform": {
    "windows-hostname": "windows"
  },
  "terminal.integrated.defaultProfile.windows": "PowerShell",
  "remote.SSH.useLocalServer": false,
  "workbench.startupEditor": "none"
}
And that’s it! With all of this I could access my PC from anywhere assuming the PC and the Pi were up and running, and my home had internet connection. A learning experience, with possibly a longer write-up than time taken to setup.
Potential Extensions
a) There are multiple ways to establish the SSH connection through other text editors besides VS Code, which could be good for working in different environments.
b) Having a fixed IP for my PC is not ideal. Setting up an internal DNS server for my home network would mean I could reach my PC through a hostname, even if its IP changed. The default router could have the option to do this, or it’s another job for the Pi.
Resources
I collated this information from:
- This kalos video @ 8:33
- WireGuard
- PiVPN docs
- A couple of StackOverflow posts…