A sign made from LEDs
An introvert’s suggestion
Over lunch, we noticed that people started to migrate to different tables randomly without much explanation. Once confronted they said that they didn’t want to be social and didn’t want to explain to people that they were not in a social mood. Even the act of explaining was too uncomfortable some days. So they’d just walk away, but didn’t necessarily want to be away, just left alone that day.
I got into watching Great Scott at the time and thought that his intro was a fun thing to try; I just didn’t have anything specific to make into a sign.
So I thought, what about a do not disturb sign? You could turn it on at lunch to denote that you didn’t want conversation but still wanted company and people talking to each other around you. I also wanted more control than the Great Scott sign. So I thought, if the NOT lights are a different circuit from the DO and DISTURB words, you could control them independently. Then you could have a DO DISTURB, and a DO NOT DISTURB all at once!
So I started with a Veroboard, and bought a packet of 50 LEDs for red and green and arranged them to my design.
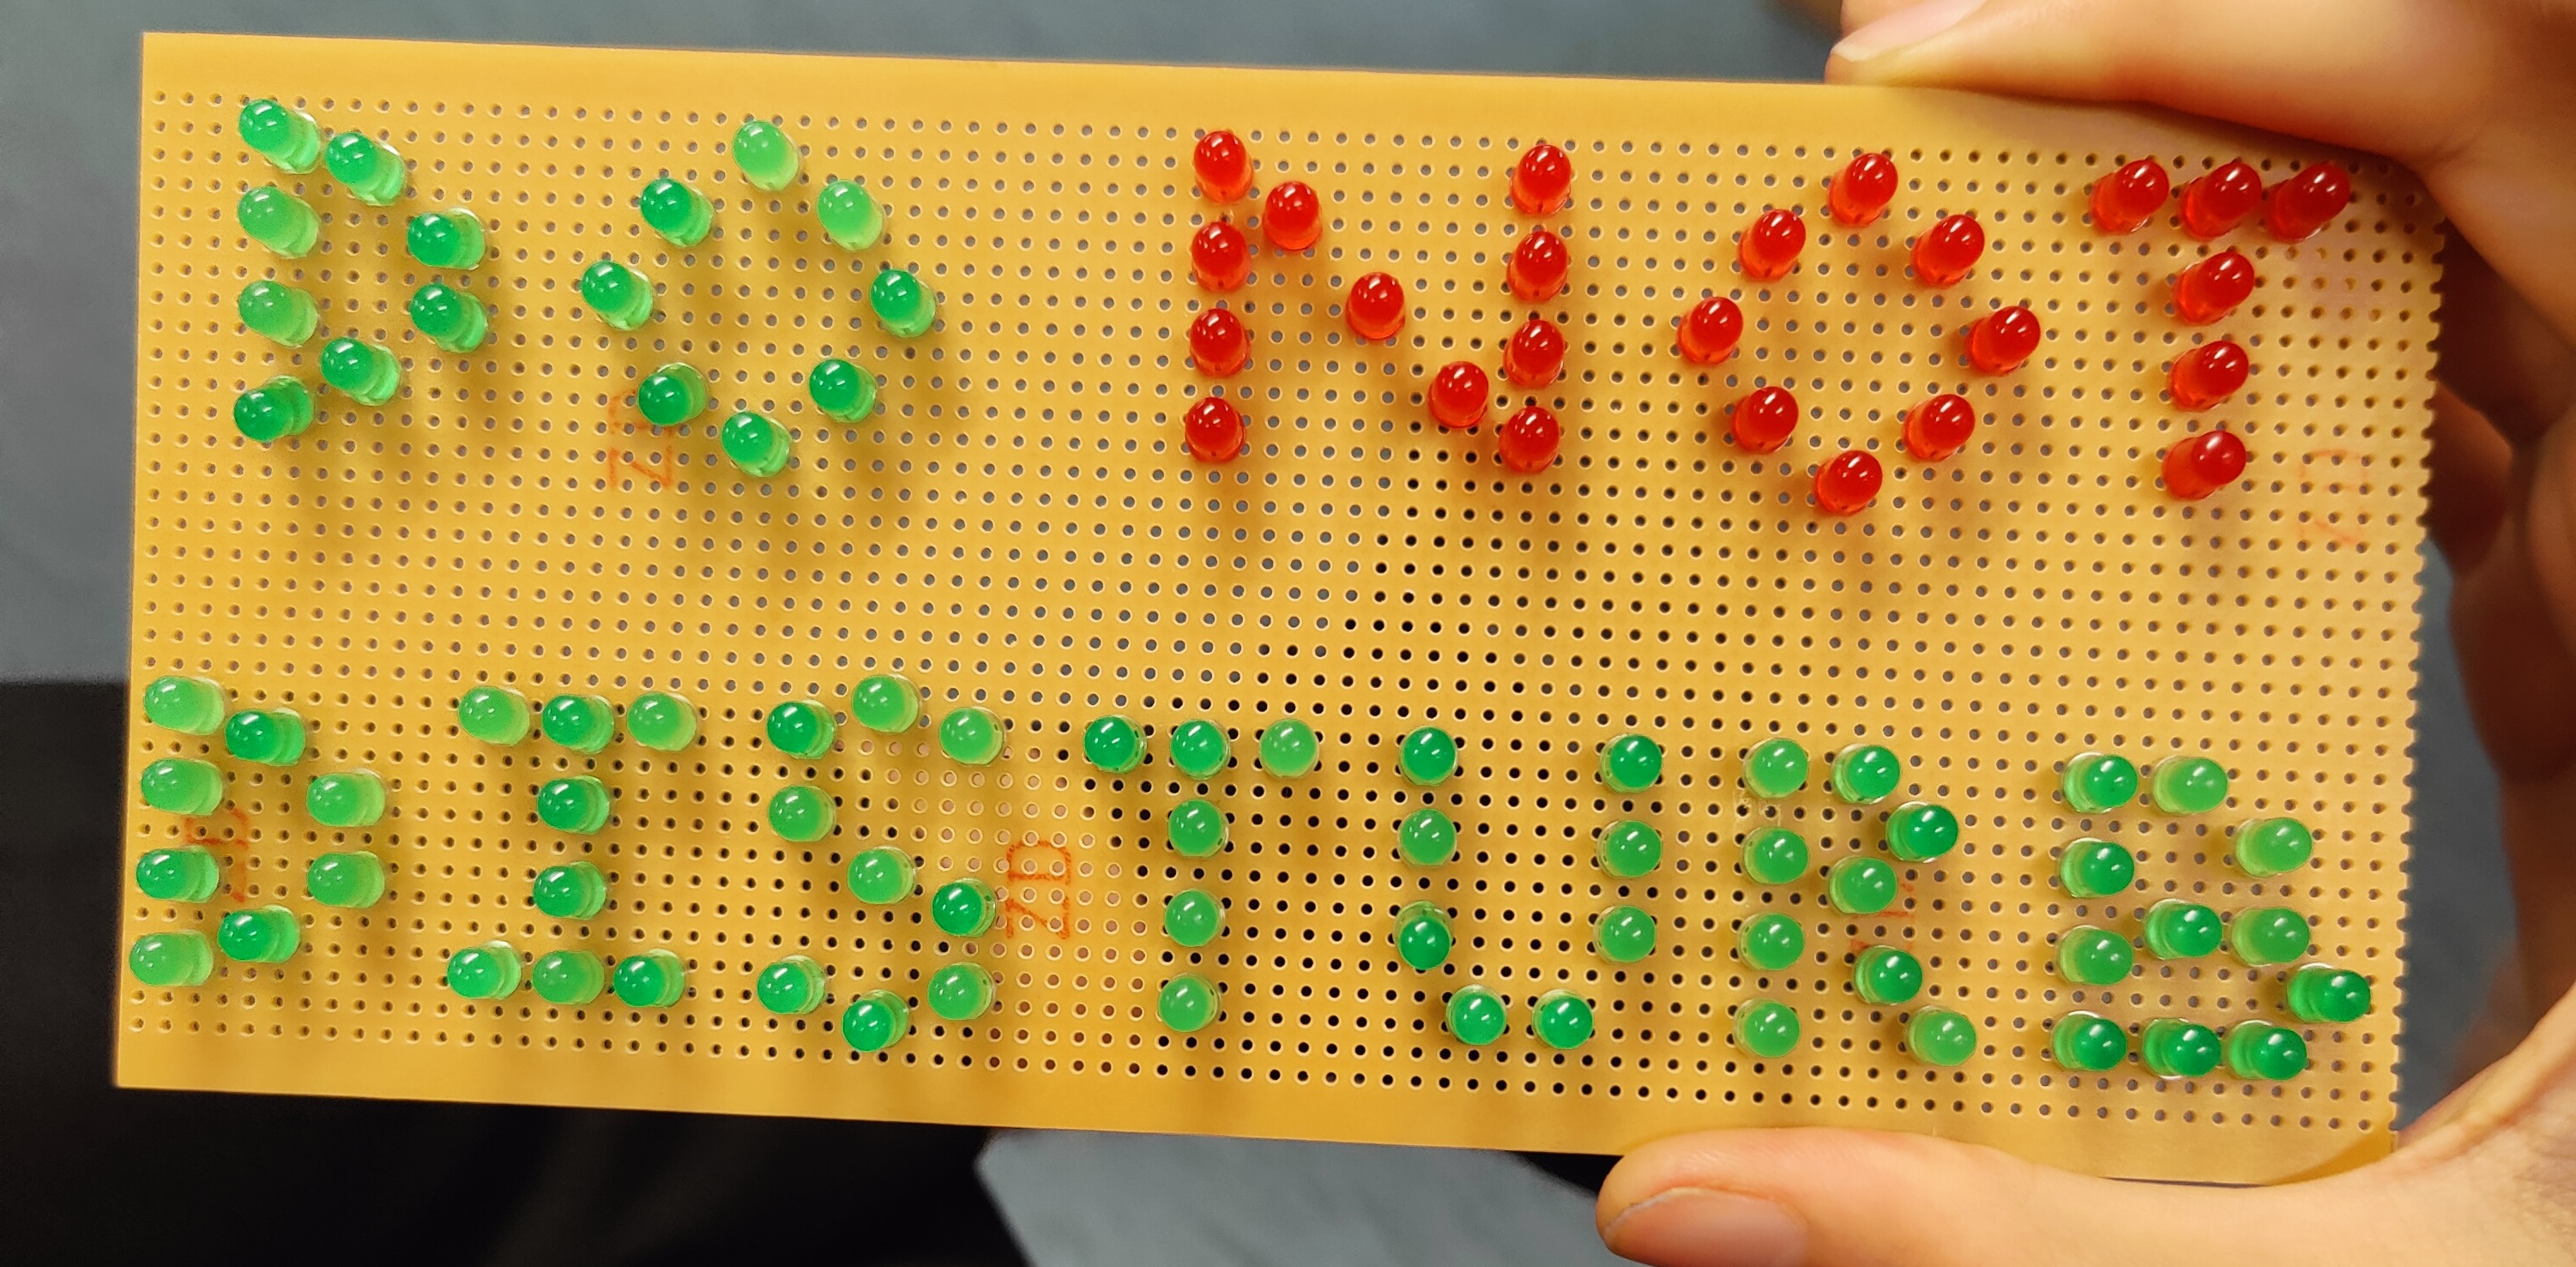 Arranging the LEDs
Designing the circuit
After some very quick calculations, I decided the easiest way to power the LEDs was with 2 of them in series using a 5V power supply. So I started trying to add some jumper wires on the Veroboard to wire up the lights and quickly realised that this would not expand well. If I kept iteratively wiring up the circuit, then if there was a point where I was stuck, it would be annoyingly difficult to refactor it.
At this point. I stopped designing on the board itself and tried looking for simulation software. I wouldn’t expect much but I did get lucky. VeeCAD does exactly what I wanted for a quick iterative prototype that I could break and rearrange as much as I wanted. It does showcase its age, but it is simple enough which I appreciate. It didn’t evolve to be something more complicated than it needed to be, and it had the amazing feature of mirroring the design before printing. That was great, as it was a challenge to try and design everything mirrored, and now that wasn’t necessary. Care was still needed, but the mirror button was an excellent proof-checker.
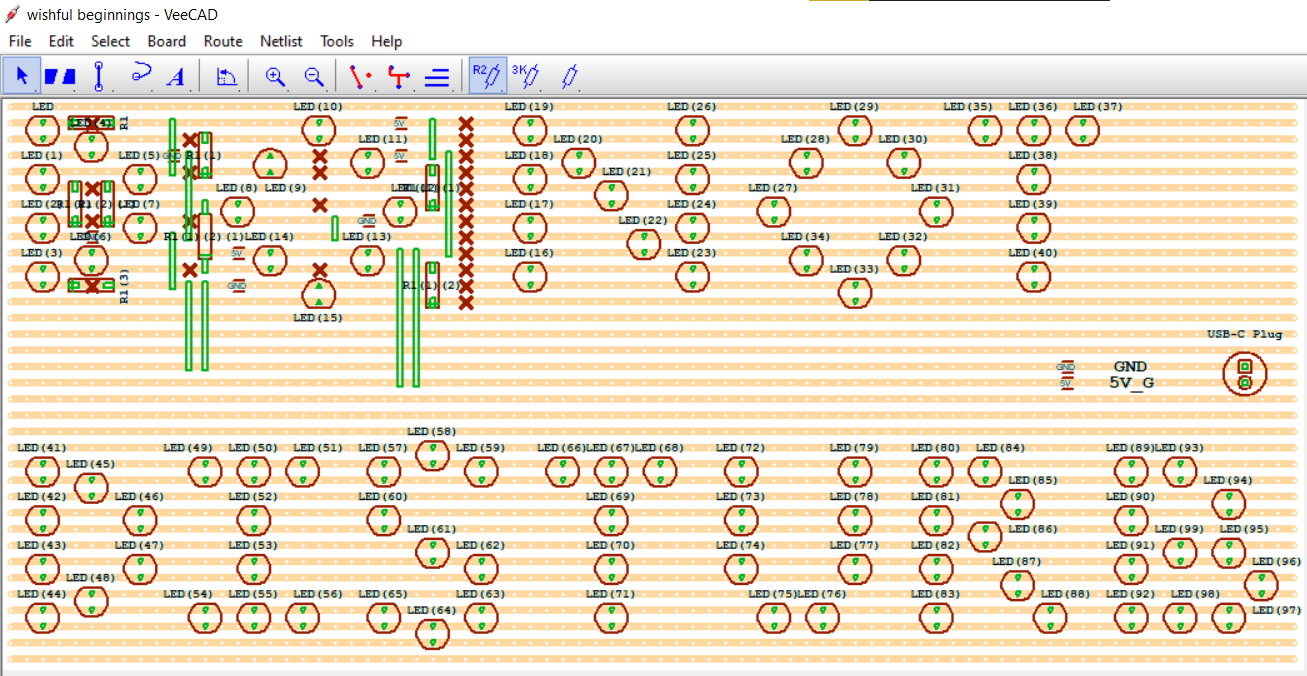 First attempt at wiring up the sign
Halfway through the first row, I realised that trying to wire up all the LEDs in pairs would be too cramped. It was at this stage that I switched to 9 Volts for power and 3 LEDs in a row. This change in combination with some clever arrangement and a slightly bigger board, meant I could just squeeze everything in for the final design. Two evenings of work later (for some LEDs!) and I got this design ready to implement.
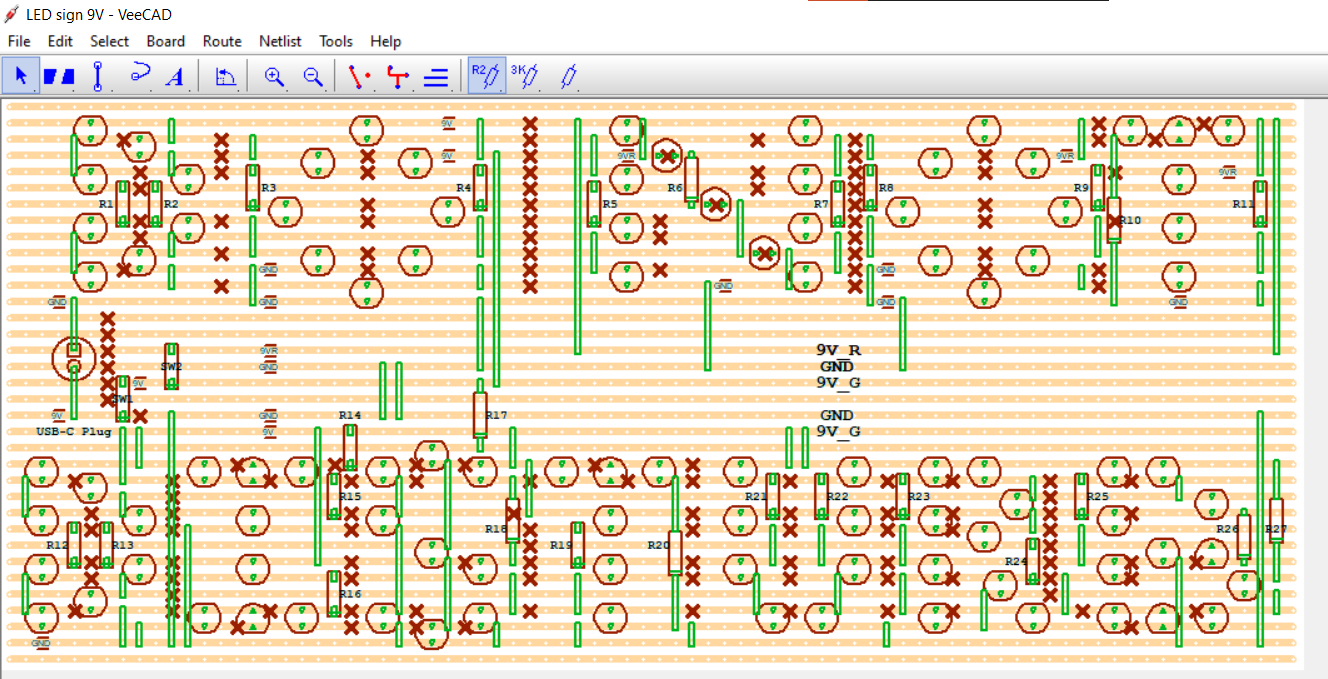 The completed design, expanded a bit
Creating it physically
Once I was happy with the design, I tried to print it to scale. Doing this in LibreOffice is not a thing I’d recommend. It does have scales in millimetres, and the printer tried its best, but it still took a couple of prints. After that, I started wiring. Here’s a picture partway through the design. Everything was powered by USB-C at the time, but eventually, I switched to a barrel-jack supply. It was certainly simpler than trying to establish the handshake for 9V.
 Completed the wiring of resistors and links. Only (!) the LEDs were left.
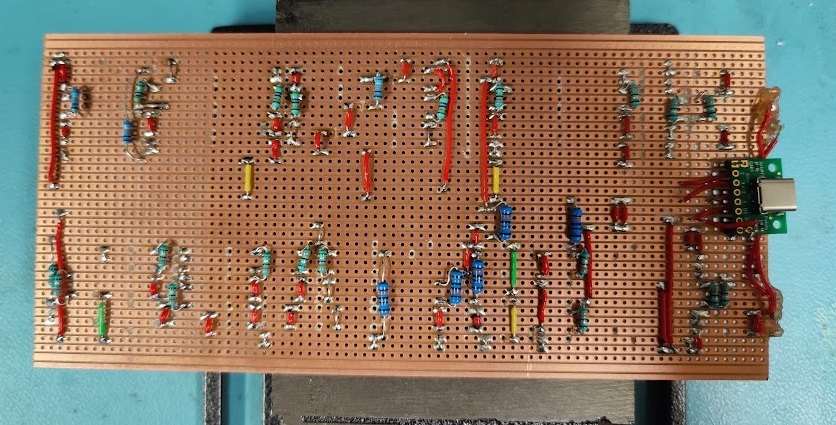
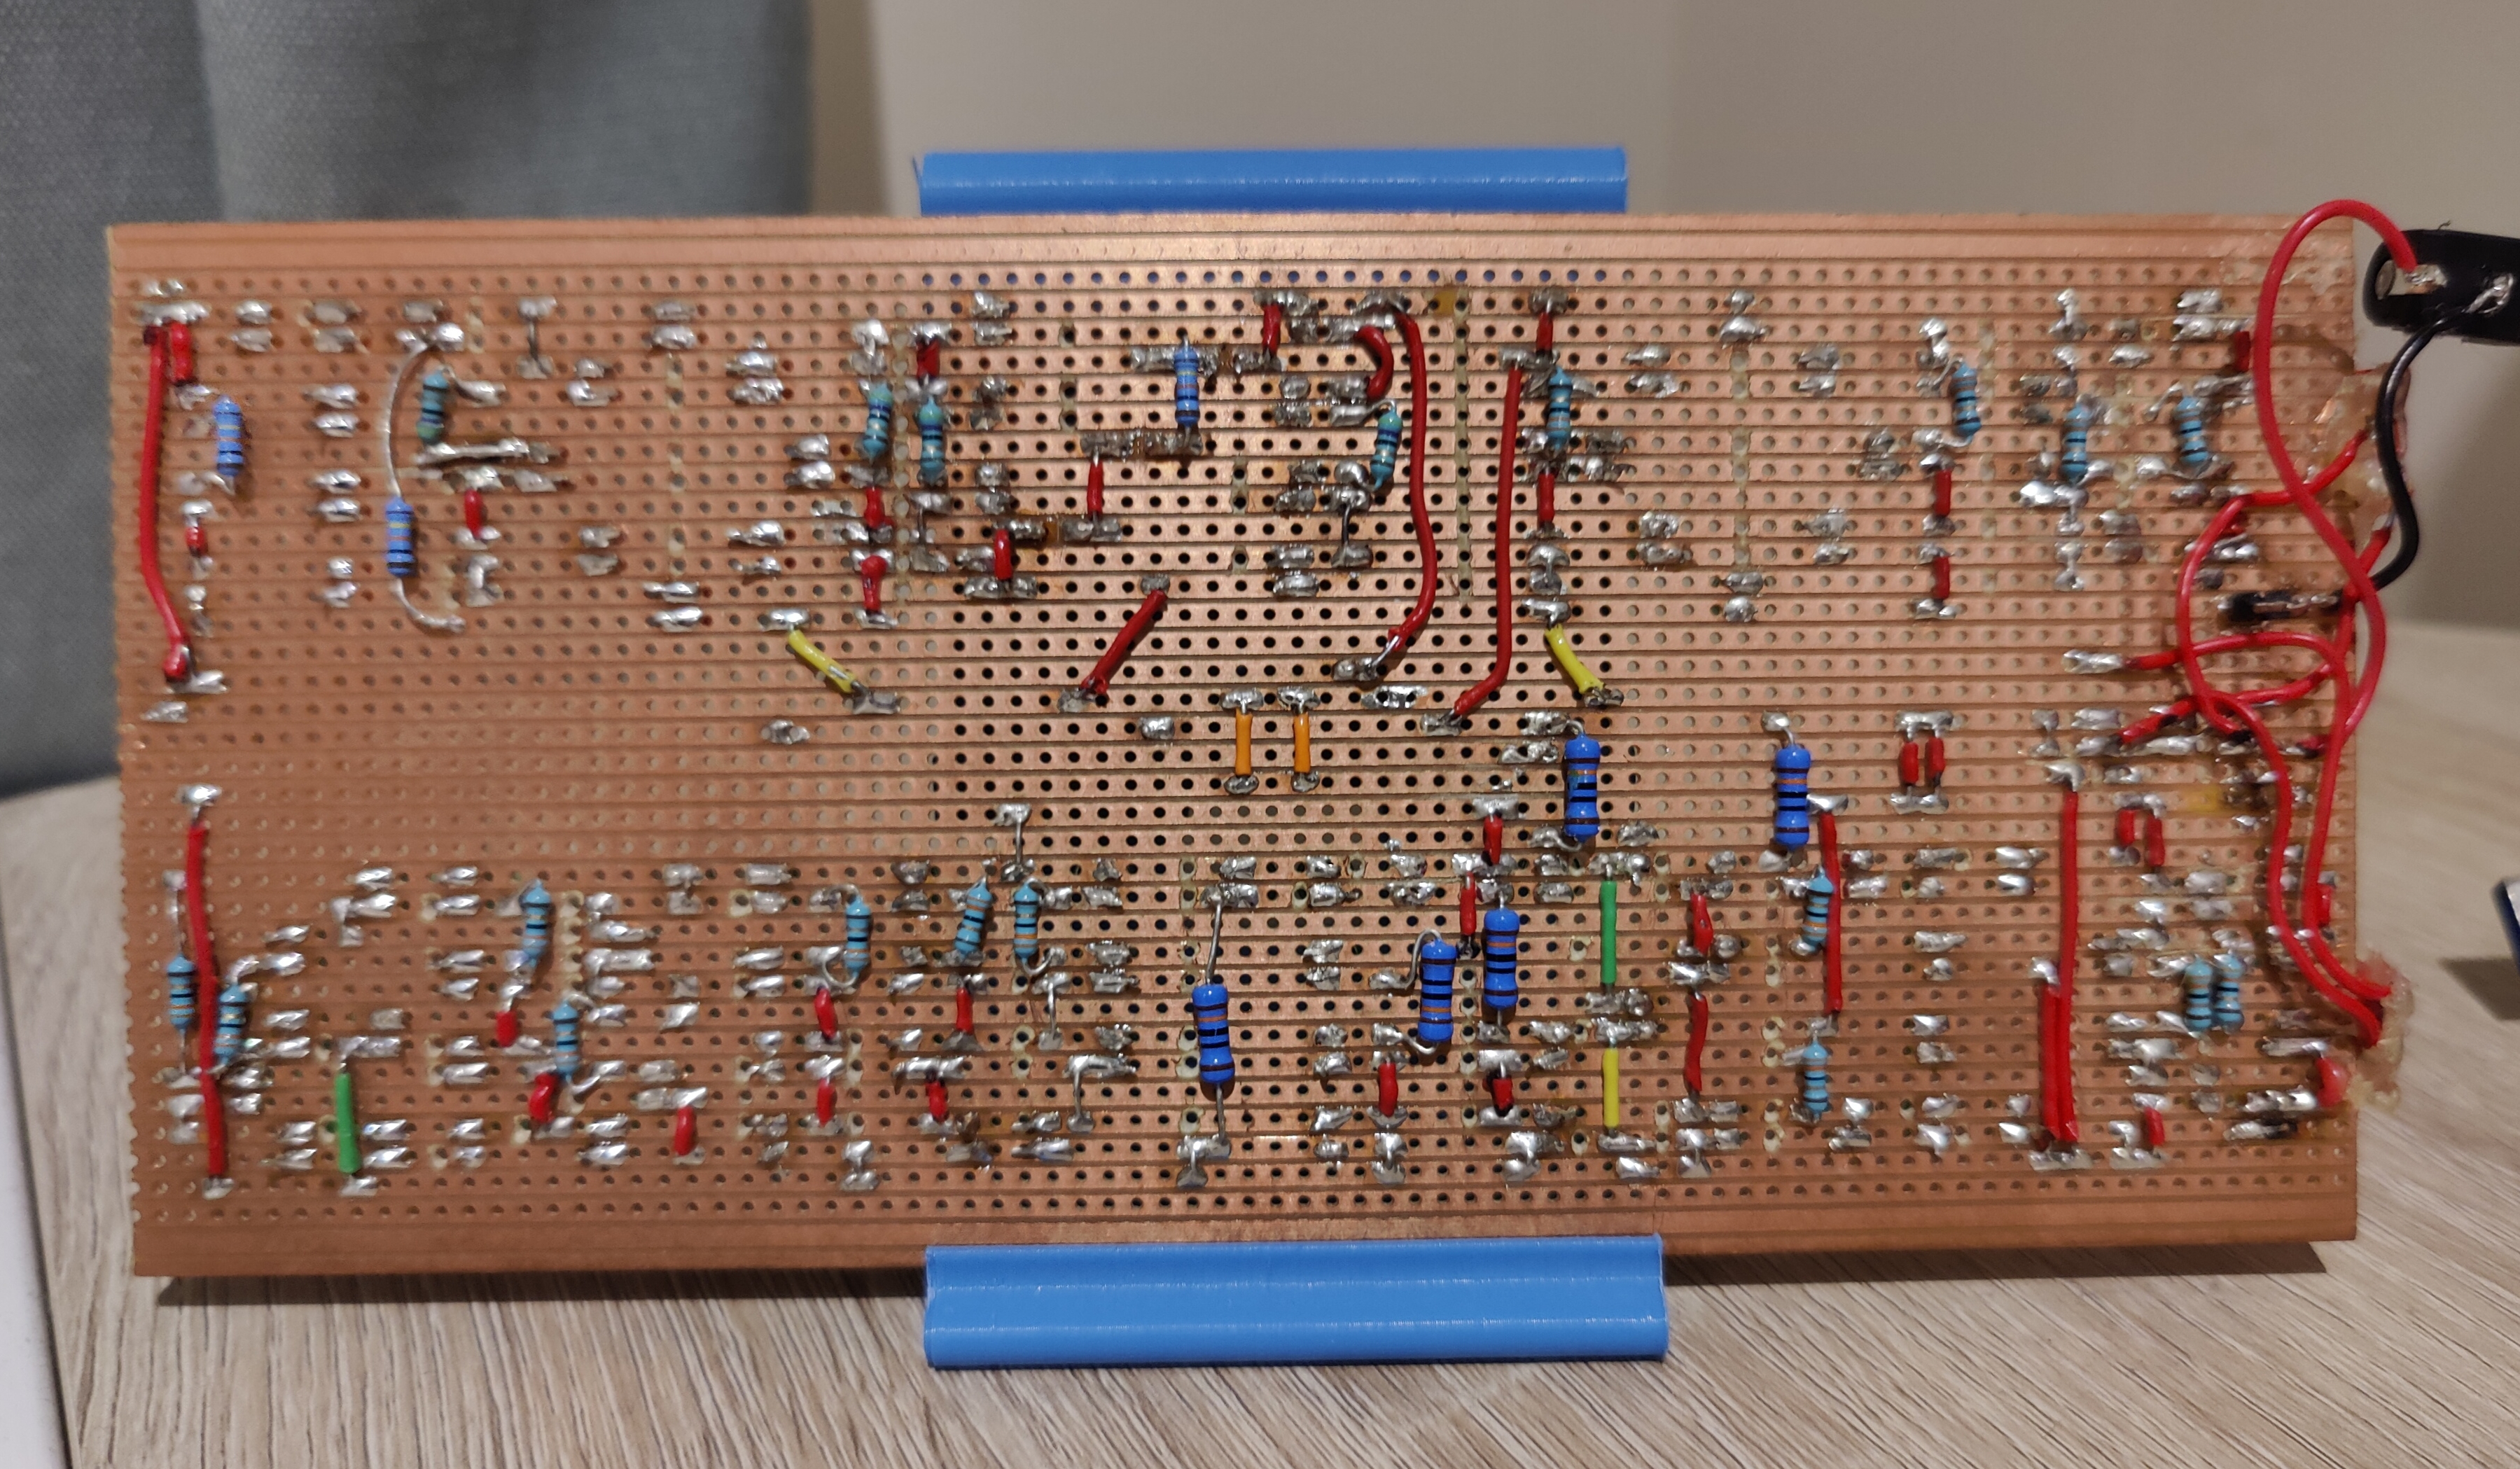 Completed design - Backside
Powering it up
I was testing the circuit at various points in time via an external power supply and crocodile clips. After I confirmed that all the lights came on as expected and stabilised in all four configurations, I started thinking about switches. The system needed to work in two of the four possible modes (Green ON Red ON, and Green ON Red OFF). If I had two separate power supplies I could have established a three-position switch, but that would not be cost-effective so I had to end up with two switches in the end.
Here are pictures of the states the sign can be in now. There is a future where I 3D-print a case for the sign, but as is I like being able to see both sides. My only gripe is that the LEDs I bought in bulk clearly came from different batches even though I hoped they’d be identical. But what can you do, the imperfections are what make it unique.

